
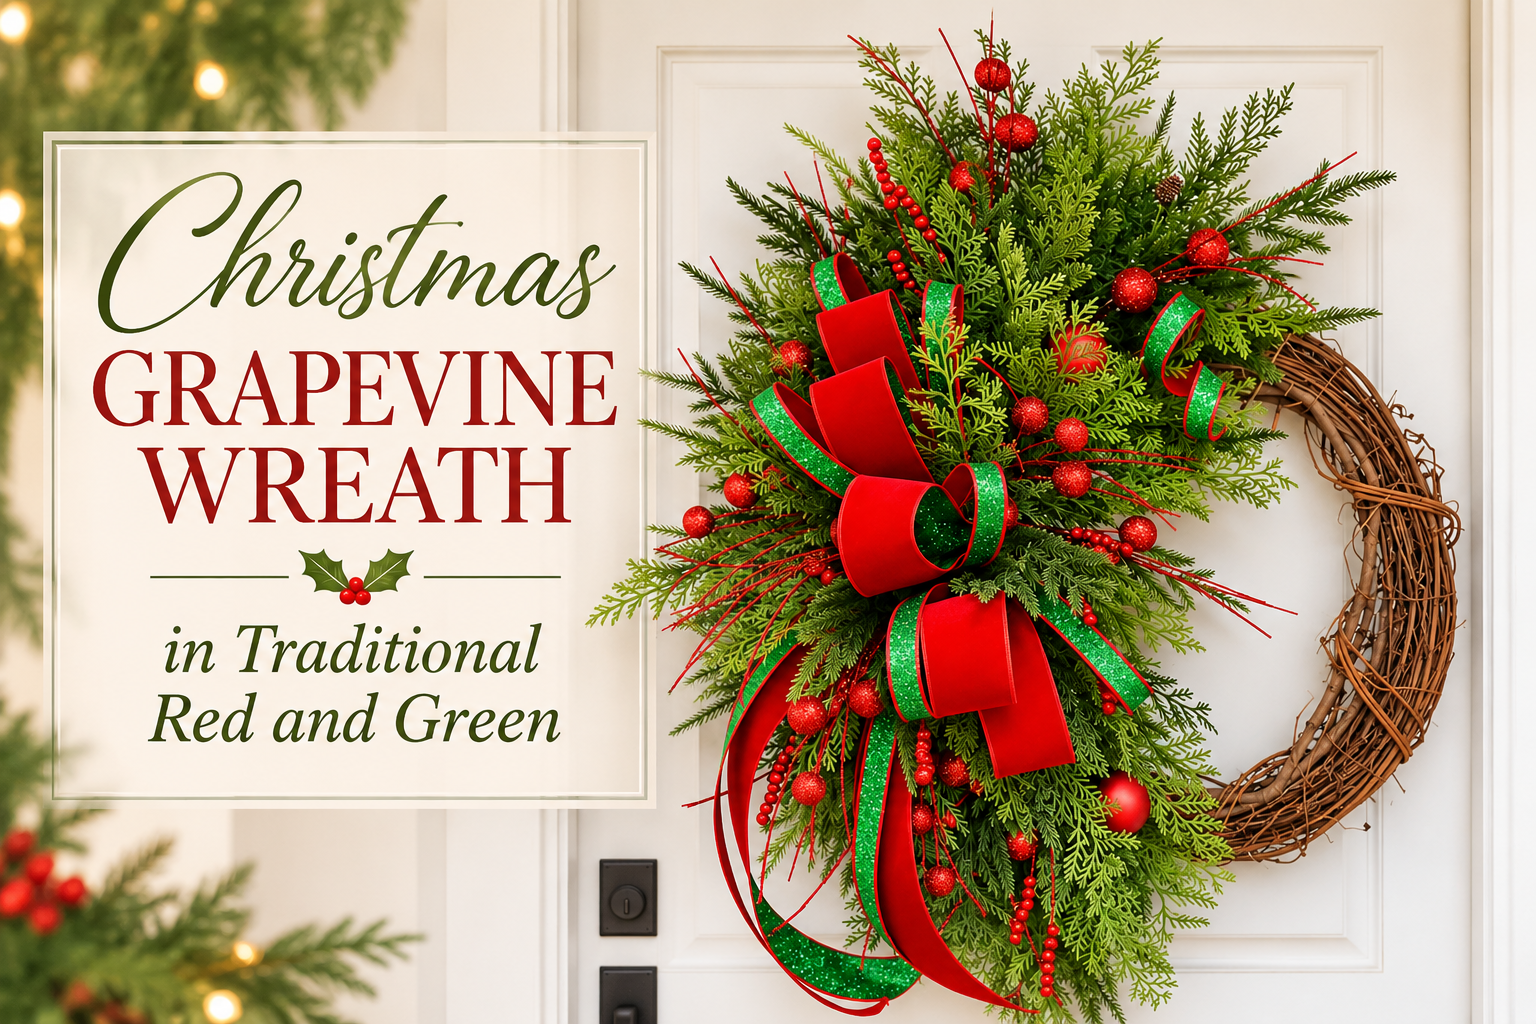
This Christmas grapevine wreath is full of classic red and green, with a playful touch of glitter. I made it on an 18 inch grapevine base, and I left part of the vine showing so it looks natural and a little different from a fully covered wreath. It’s easy to make, and you can change it to fit your door.
If you want a traditional Christmas wreath that still feels fun, this is the one. Here’s how I made it.
Watch the Full Christmas Grapevine Wreath Tutorial
I filmed every step, including when I stop to fix a hole. If you’re new here, come subscribe so you don’t miss the next tutorial. New videos go up on Sundays.

Supplies for a Christmas Grapevine Wreath
Everything below is in the shop, in the order I use it.
- 18 inch grapevine wreath
- 2.5″ Farrisilk Emerald and Red Wired Christmas Ribbon, red velvet side up, for the bow loops and tail
- 1 1/2 inch Farrisilk Emerald and Red ribbon, green glitter side up
- Cypress Norfolk Pine Bush for the main greenery
- Real Touch Norfolk Pine Bush, a slightly darker green for contrast
- Matte Stemball Holiday Ornament Cluster in red
- 35″ Red Glitter Ball and Bead Spike Spray
- Floral picks, hot glue, a little moss, and metal snippers
You can shop all of it at tctcrafts.com, or browse the Traditional Red and Green Christmas collection to mix in your own favorites.
How to Make a Christmas Grapevine Wreath
Step 1: Start with your bow
I made my bow ahead of time. The loops are the 2.5 inch ribbon with the red velvet side up, and the 1 1/2 inch ribbon is flipped so the green glitter shows. Put the bow on a floral pick, then glue it into the grapevine where you want it. I like it a little off to the side, not dead center.
My tip: a strong wire in the ribbon keeps the loops standing at attention instead of flopping. That’s why I use designer ribbon.
Step 2: Cut your greenery into clusters
Pull the cypress Norfolk pine bush apart into small sections. Keep as many clusters as you can, because clusters mean you use fewer picks. Singles are great for filling gaps.
Step 3: Anchor the bow and build the base
Tuck greenery right behind the bow first. Bend each stem with your fingers so it flows the way you want, then glue or pick it into the vine. I went about three quarters of the way around and left the rest of the grapevine bare. That saves greenery, and it gives the wreath its look.
Step 4: Hang it up and check for holes
I do as much as I can on the table, then hang the wreath to finish. Once it’s up, you can really see the holes. Follow the circle of the vine with your eye and fill any spots that look sucked in.
My tip: if you see a hole, fix it right then. It’s much easier than finding it in your photos later.
Step 5: Add the darker Norfolk pine
Mix in the real touch Norfolk pine for a little contrast. It’s only a shade darker, but it adds depth and helps fill out the shape. I like to use two or three kinds of greenery in every design, so it never looks flat.
Step 6: Add the tail and extra loops
Pinch the red velvet and the green glitter ribbon together and put them on a pick for your tail. Keep it long at first, because you can cut it shorter but you can’t add length back. Tuck a little greenery under the tail to lift it up.
If you want another loop, you don’t have to redo the bow. Just put a piece of ribbon on a pick and glue it in. I also made a few little curls with the narrower ribbon and tucked them in for extra whimsy.
Step 7: Add the ornaments in a triangle
Clip the ornaments off the cluster and fold the wire so your pick has something to grab. Place one next to the bow, then work in a triangle pattern around the wreath so your eye moves across it. I wired one ornament onto a piece of greenery and glued a glitter ball into a gap near the bow.
Step 8: Tuck in the red glitter sprays
Cut the glitter spray into little pieces and tuck them in where you want some sparkle. I snip off some of the grassy bits, because a few look fun and too many can take over. Skip the sprays for a simpler look.
Step 9: Clean up the back
If any metal pick ends poke through the grapevine, clip them off with metal snippers. A little moss on the back helps hold the stems, especially on grapevine with big gaps. If you sell wreaths, let your customers know the moss can shake loose in shipping and that it’s normal.
Design Tips and Easy Ways to Change It
- Use clusters. They save picks and time.
- Work on the table first, then hang it to fix the shape.
- Make a triangle with your ornaments so the design feels balanced.
- Keep the ribbon tails long until the end.
Want a different look? Here’s what I’d try.
- Use a smaller grapevine wreath, like 14 inch, and you’ll need less of everything.
- Swap the bow for a different color and you’ll have a whole new wreath.
- Add holly, red berries, or snowy greenery.
- Add bells. I skipped them because the green glitter felt more whimsical, but they’d look sweet.
- Skip the glitter sprays for a classic, quieter look.
The Finished Christmas Grapevine Wreath

Finished size: 36″. Want to make one for your own home, or have me make it?
This wreath is perfect on a front door, but it works on a wall, a mirror, or inside a window too. If you like a more elegant Christmas look, my post on Williamsburg Christmas decor has fruit and magnolia ideas that mix beautifully with greenery.
Shop the Look
Ready to make your own Christmas grapevine wreath? Start here.
- 2.5″ Farrisilk Emerald and Red Wired Christmas Ribbon
- Cypress Norfolk Pine Bush
- Matte Stemball Holiday Ornament Cluster
- 35″ Red Glitter Ball and Bead Spike Spray
You can also browse the full Christmas collection for more ribbon, greenery, and picks.
Your Turn
Pick your colors, grab a grapevine, and make it yours. Christmas is the one time you really can’t go wrong.
Before the season gets busy, grab my free Seasonal Decor Planning Checklist so you know what to buy and when to put it out. And tell me in the comments: would you add bells or leave them off?